
Your first app
This page takes an app from an empty project to a package you can install: build the frontend, try it on your own computer with the mock desktop of pithyx dev, check it with pithyx validate and write the package with pithyx pack. There is no development mode on the box; you test on the box by installing the package.
Set up the project
Section titled “Set up the project”The pithyx command has no command that creates a project. Start from any frontend project (the examples use Vite) and add the files the CLI expects at the project root:
pithyx.json, the manifest. Add"$schema": "./node_modules/@pithyx/sdk/schema/manifest.v1.schema.json"for editor support.icon.svg. The CLI package ships atemplate-icon.svg;pithyx validatewarns whileicon.svgis still that icon.- The built frontend in
dist/(change the folder with--frontend <folder>). Yourentrymust befrontend/<file>.html; the content ofdist/becomesfrontend/in the package.
Install the packages and connect:
npm install @pithyx/sdk@nextnpm install --save-dev @pithyx/cli@nextimport { connect } from '@pithyx/sdk';
const app = await connect();The CLI needs Node.js 22.12 or newer. Its Vite plugin (@pithyx/cli/vite, Vite 7 or newer) sets the build’s base path to ./ so relative asset paths work under /apps/<id>/:
import pithyx from '@pithyx/cli/vite';import { defineConfig } from 'vite';
export default defineConfig({ plugins: [pithyx()] });
pithyx dev
Section titled “pithyx dev”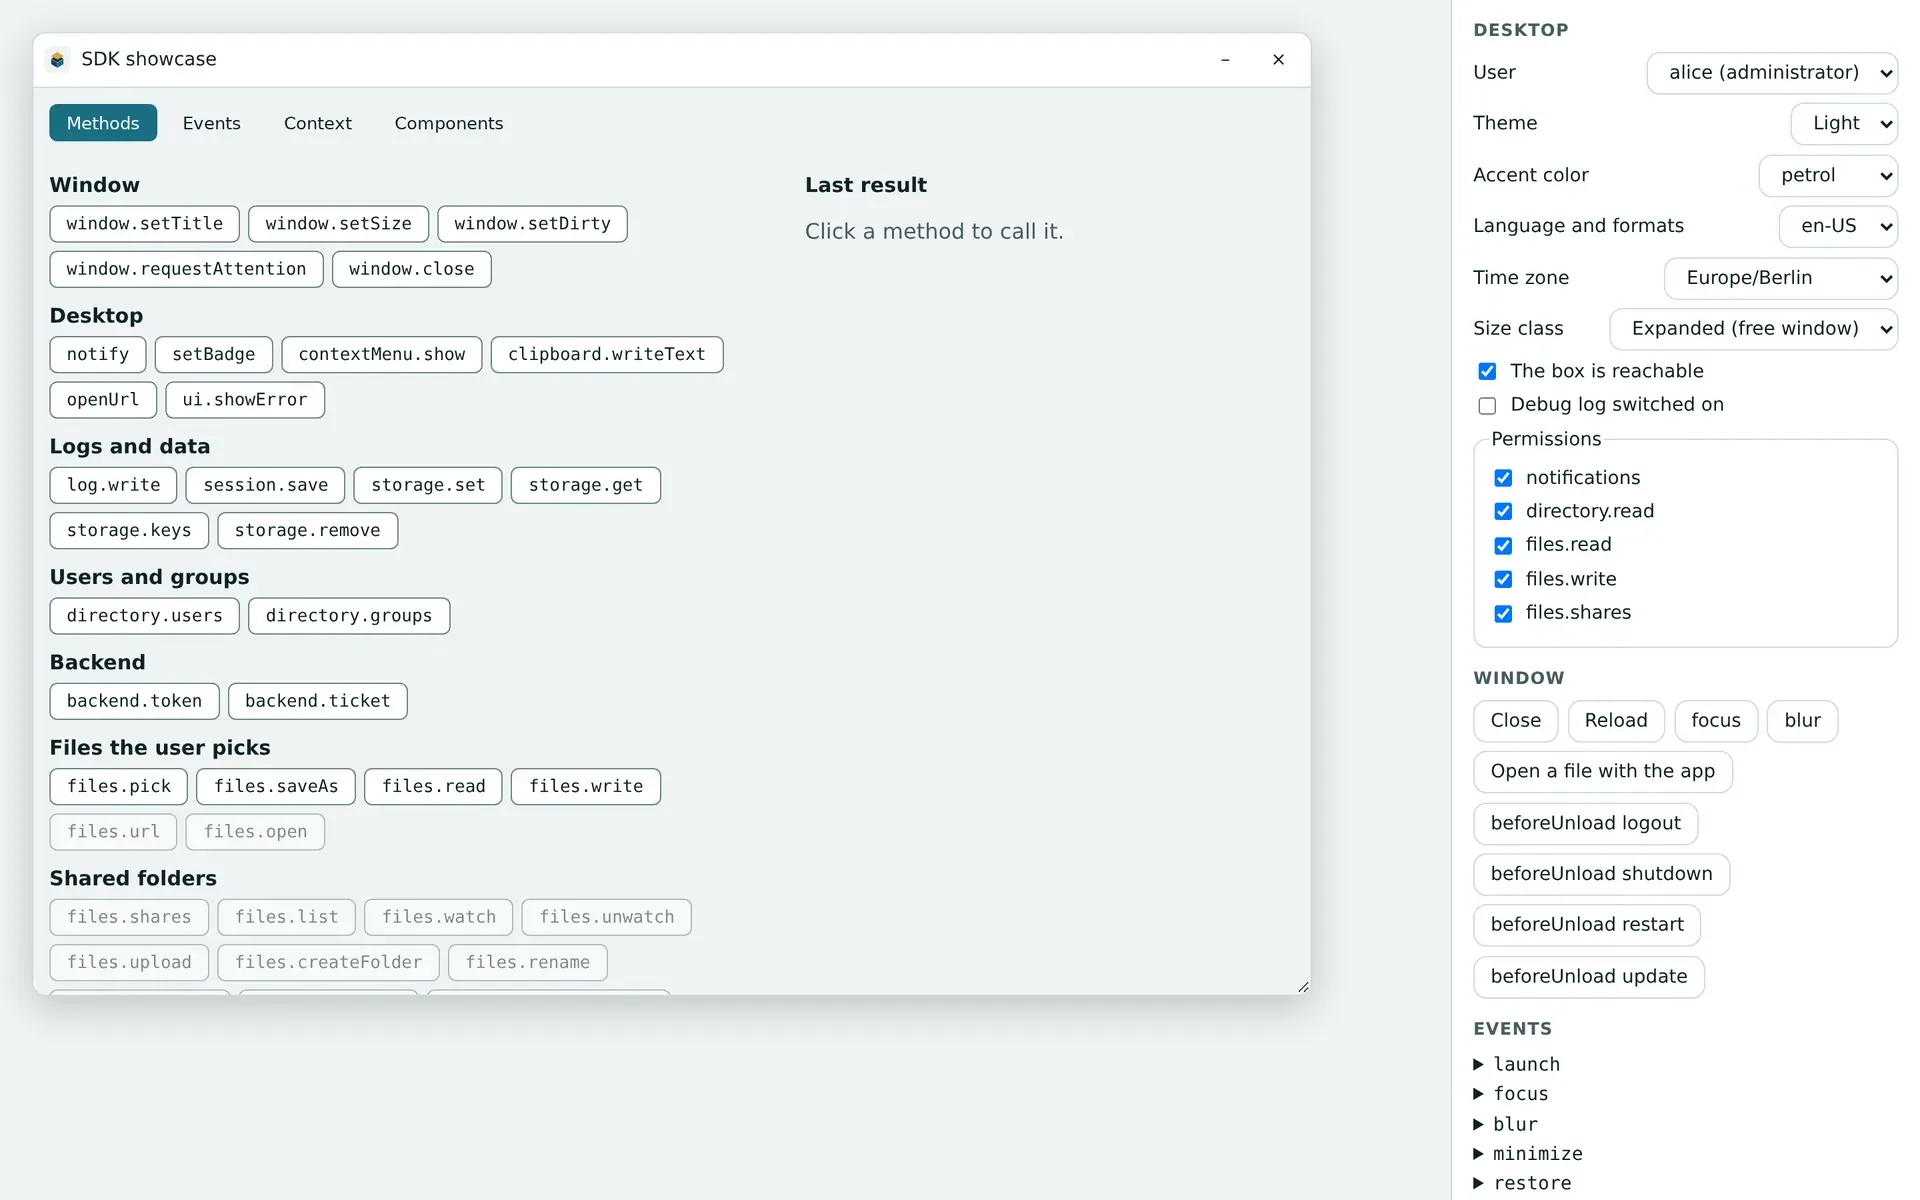
The mock desktop of pithyx dev: the side panel changes the user, theme, language and permissions the app sees.
pithyx dev starts a mock desktop on http://127.0.0.1:7400/ (change it with --port and --host), opens your built frontend in the same sandbox the box uses, and proxies /apps/<id>/api* to your backend. After a change, rebuild the frontend and reload.
With the Vite plugin you can run vite instead: the mock desktop joins the dev server, the base becomes /apps/<id>/, and hot reload works.
The mock desktop has three users (alice, an administrator; bob, in two groups; carol, in none) and a panel to change the theme, accent, language, time zone, size class, online state and permissions, and to see the backend status, storage and events.
A backend runs with docker compose up --wait --build. The CLI uses backend/compose.dev.yaml if it exists, otherwise the pinned backend/compose.yaml, and publishes each endpoint’s port on 127.0.0.1 for the proxy. (The box never publishes ports.) Without Docker:
--endpoint name=url(repeatable) sends an endpoint to a server you started yourself and does not start Docker for it.--no-dockerdoes not start the backend; endpoints without--endpointanswer 503.
Press Ctrl+C to stop; the CLI runs docker compose down and keeps volumes.
Build the package
Section titled “Build the package”- Build the frontend (for example
vite build). pithyx validatecheckspithyx.json, the icon, the layout, the entry file in the built frontend, the Compose file and the image lock. It prints<level> <code>: <text>and exits with 1 on errors. It uses the same validators as the box and the same error codes. Beforepithyx build(which needs Docker) it checksbackend/compose.dev.yamlinstead and warnscli.backend.unbuilt.- With a backend, make the Compose file pinned by digest: either
pithyx lock(resolves the images ofbackend/compose.yamland writesbackend/images.lock.jsonfor amd64 and arm64; registries are asked anonymously or with the credentials in~/.docker/config.json) orpithyx build(builds the services ofbackend/compose.dev.yamlthat havebuild:and writes both files). pithyx pack [--out <file.pithyxapp or folder>] [--images]validates again and writes the package.--imagesadds the images for offline installs and needs Docker.
Details of every command are on @pithyx/cli.
Install it on a box
Section titled “Install it on a box”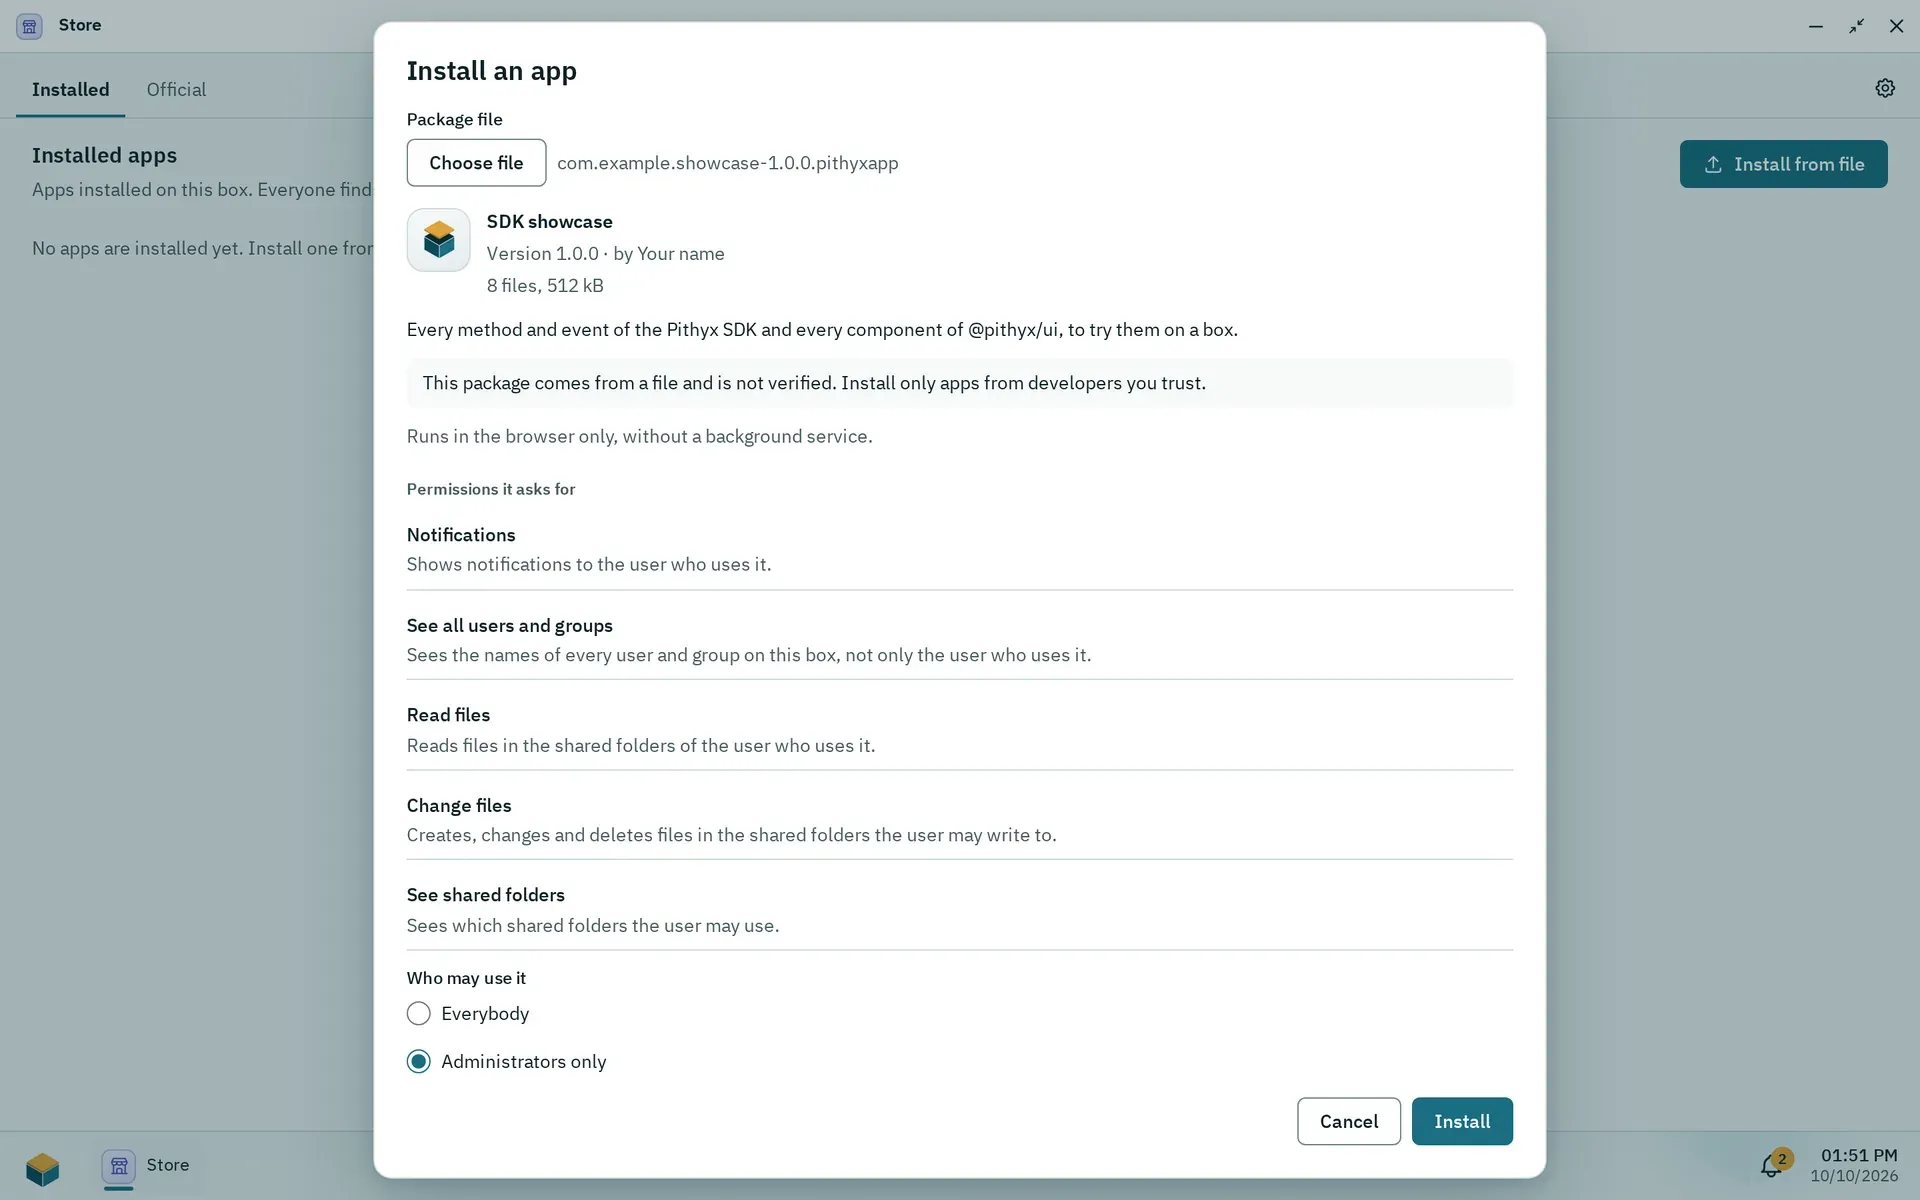
Install from file shows the package before it installs: the unverified warning, its permissions and who may use it.
Only an administrator can install a package.
- Open the Store and the Installed tab, and choose Install from file.
- Choose the
.pithyxappfile. The dialog Install an app shows the version and whether this is an install, update, reinstall or downgrade, the author, the file count and size, and the warning “This package comes from a file and is not verified.” - Review the permissions the app asks for, the folders it wants, whether it has a backend, whether it runs as root, and who may use it.
- On the first app install of the box, choose the pool for app data; every app keeps its files there. Without a pool the dialog says to create one in Storage first.
- Confirm. Installing runs as a job.
After the install, an administrator maps the app’s storage requests to shared folders and can revoke permissions. An update that asks for a new permission waits for the administrator’s confirmation and the old version keeps running. An update takes a snapshot of the app’s data; a rollback returns to the previous version with its data. See Apps and the Store.
Install from a script
Section titled “Install from a script”The Store does nothing a script cannot do with the REST API. Sign in as an administrator, upload the package, then install it as a job:
BOX=https://box.local:7484curl -sS --cacert root-ca.crt -c cookies -H 'X-Pithyx-Request: 1' -H 'Content-Type: application/json' \ -d '{"username":"admin","password":"..."}' "$BOX/api/auth/login"curl -sS --cacert root-ca.crt -b cookies -H 'X-Pithyx-Request: 1' -H 'Content-Type: application/gzip' \ -X PUT --data-binary @com.example.notes-1.0.0.pithyxapp "$BOX/api/apps/packages"# The answer is the preview: packageId, action, permissions, keptData, suggestedAccess, pool.curl -sS --cacert root-ca.crt -b cookies -H 'X-Pithyx-Request: 1' -H 'Content-Type: application/json' \ -d '{"pool":"tank","access":"everybody"}' "$BOX/api/apps/packages/<packageId>/install"# 202 with the job; follow it with GET /api/jobs/<id> until its state is succeeded or failed.root-ca.crtis the box’s own certificate authority from$BOX/api/system/tls/root-ca.crt(see Certificates).- An account with two-factor sign-in gets a
challengefrom the first call and completes it withPOST /api/auth/login/totp. poolis needed only for the first app of the box;access(everybodyoradmins) defaults to the preview’ssuggestedAccess. A checked package waits 15 minutes for its install.